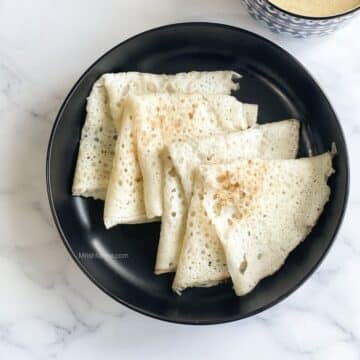
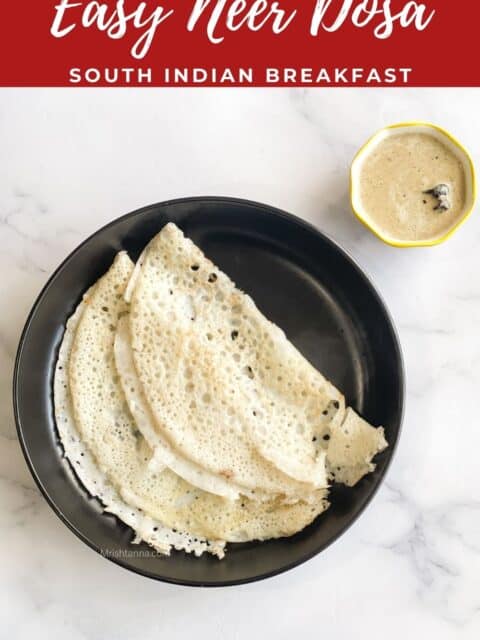
Neer Dosa is one of the simplest yet most elegant breakfasts from coastal Karnataka. I grew up in Mangalore, watching my grandmother make this delicate, lacy dosa with effortless ease.
She never measured anything just soaked rice, ground it smooth, adjusted the water by instinct, and poured thin streams of batter onto a hot cast iron pan.

"Neer" means water in Kannada and Tulu, and that's exactly what makes this dosa special the batter is thin and flowing, almost like buttermilk. Unlike traditional dosa, there's no fermentation, no lentils, and no long ingredient list. Just rice, water, and salt transform into something incredibly soft, light, and naturally gluten-free.
If you enjoy simple traditional recipes like idli made in Instant Pot, soft poha dosa, or classic urad dal vada, you'll appreciate how fuss-free this one is. And if you're serving it with something comforting, try it alongside easy coconut chutney, instant pot vegetable sambar, or a lightly spiced cabbage gassi curry for a complete meal.
If you like dosa recipes, check my classic dosa batter and dosa recipe, barnyard millet dosa, oats and quinoa dosa recipe.
Your neer dosa recipe is awesome with all the types. thank you!
- Manjula
Quick Look: Neer Dosa Recipe
- ✅ Recipe Name: Easy Neer Dosa recipe
- 🕒 Ready In: 45 minutes
- 👪 Serves: 3
- 🍽 Calories: 96 per serving (estimated)
- 🥣 Main Ingredients: Sona masuri rice, water and salt
- 📖 Dietary Info: Vegan; gluten-free
- 👌 Difficulty: Easy, Indian flavors, minimal prep
SUMMARIZE & SAVE THIS CONTENT ON
Jump to:
Why You Will Love This
- No fermentation required
- Naturally gluten-free
- Just 3 basic pantry ingredients
- Thin, soft, and tender texture
- Perfect for breakfast or light dinner
- Batter can be made ahead and refrigerated
- Customizable with coconut or methi seeds
Key Ingredients
- Rice: Use long-grain white rice, sona masoori, or idli rice.
Avoid basmati or jasmine rice as they change the texture and make dosa fragile. - Optional Additions: Fresh grated coconut- for subtle sweetness and softness and Methi seeds (fenugreek seeds) - improves tenderness and softness to the dosa.
See the recipe card for a list of ingredients and quantities, plus recipe instructions. You can find the recipe card at the bottom of this post.
Variations
- Plain Rice Neer Dosa: This is the most traditional and simplest version made with just soaked rice, water, and salt. It gives a light, soft, and delicate texture. If you are making neer dosa for the first time, start with this version to understand the correct batter consistency and pouring technique.
- Rice & Coconut Neer Dosa: In this variation, a few tablespoons of fresh grated coconut are added while grinding the soaked rice. The coconut adds mild natural sweetness and makes the dosa slightly softer and more aromatic. This version pairs especially well with spicy chutneys or sambar. Beginner tip: If using coconut, reduce water slightly while blending, then adjust to thin consistency at the end.
- Rice & Methi Seeds Neer Dosa: Add 1 teaspoon of methi seeds (fenugreek seeds) while soaking 3 cups of rice. This traditional coastal method gives the dosa extra tenderness and a subtle aroma. Methi also improves digestibility and helps prevent the dosa from turning dry. Beginner tip: Do not add too much methi; more than 1 teaspoon can make the dosa slightly bitter.
- Rice Flour Neer Dosa (Quick Version): If you don't have time to soak rice, you can use rice flour instead. Gradually mix rice flour with water until you get a smooth, lump-free, thin batter. Let it rest for at least 20-30 minutes before making dosa. Add salt and adjust water as needed. This version is quicker and more convenient, but the texture may be slightly less soft compared to the soaked rice batter.
Each version maintains the essence while offering subtle flavor variations.
How to Make Neer Dosa

- Soak the Rice and fenugreek: Rinse rice and methi seeds thoroughly and soak for 4-6 hours or overnight.
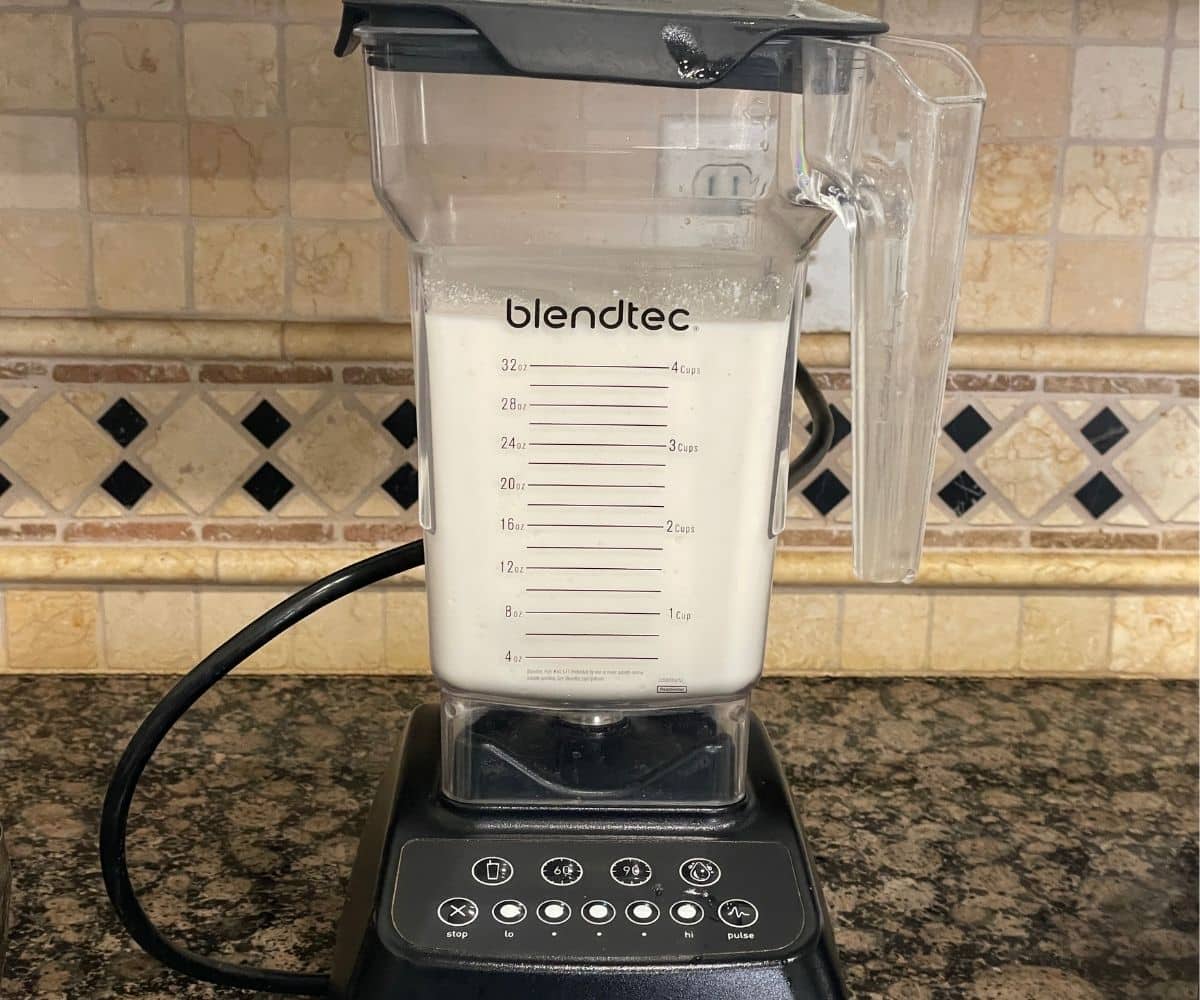
- Blend the Batter mixer: Drain the soaked rice and blend with 2 cups of water until very smooth.
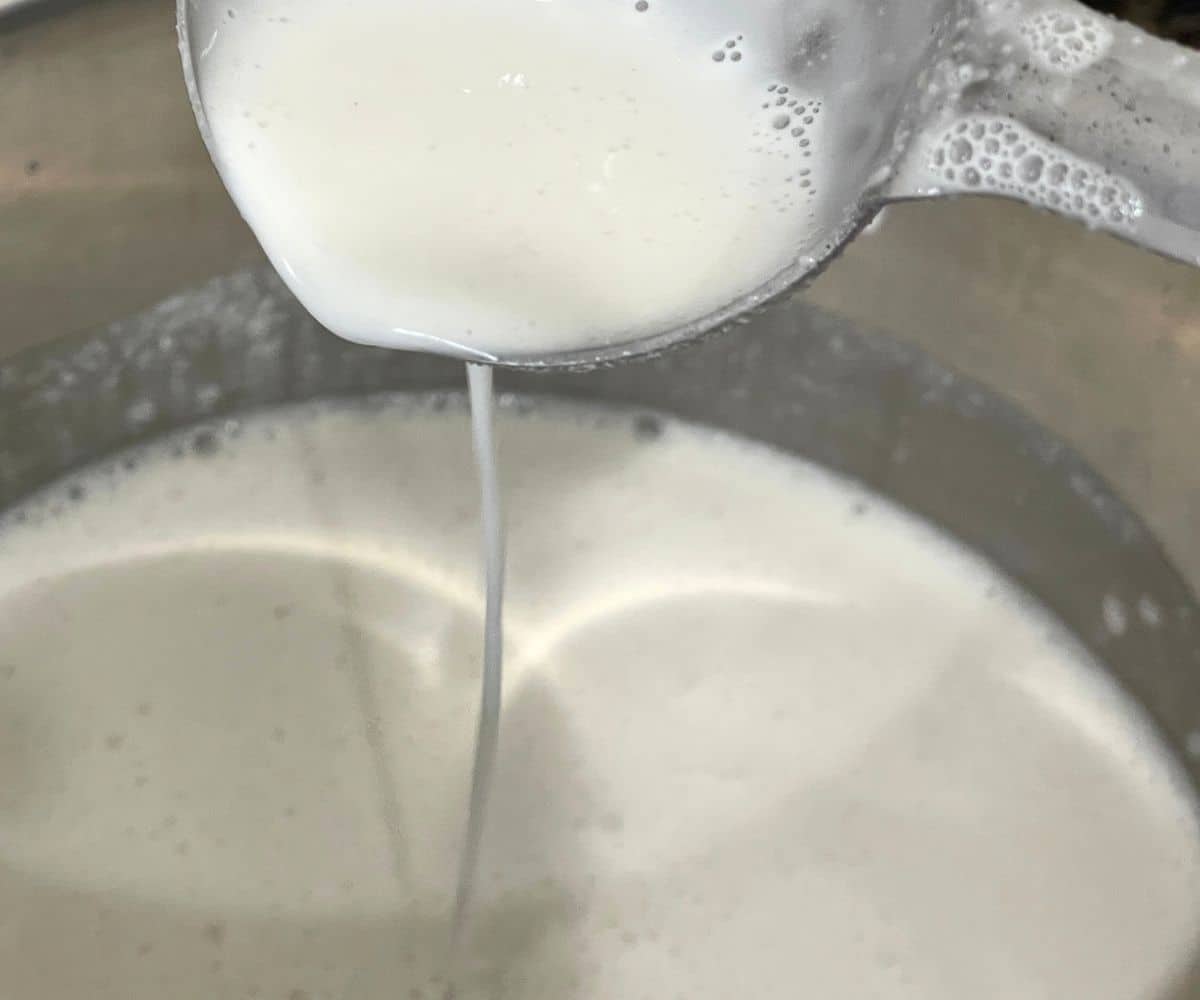
- Add Salt: Pour the neer dose batter to the big wide bowl. Add salt, Mix well. Add more water gradually until the smooth batter becomes thin and flowing. This is the most important step the batter must not be thick.
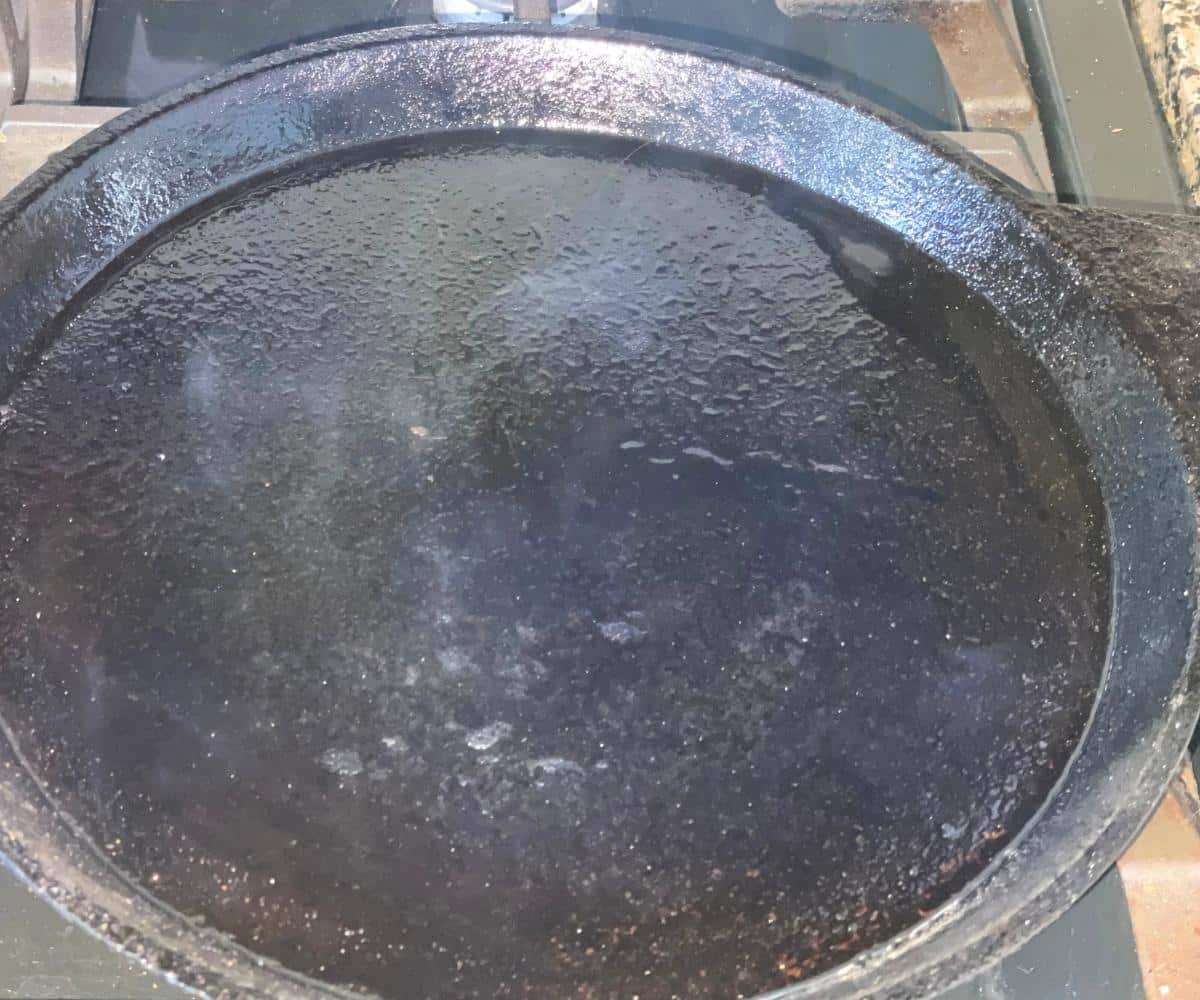
- Heat the Pan: Use a well-seasoned cast iron tawa for best results. Heat on medium and lightly grease with oil (sesame oil works beautifully). The pan must be hot but not smoking.
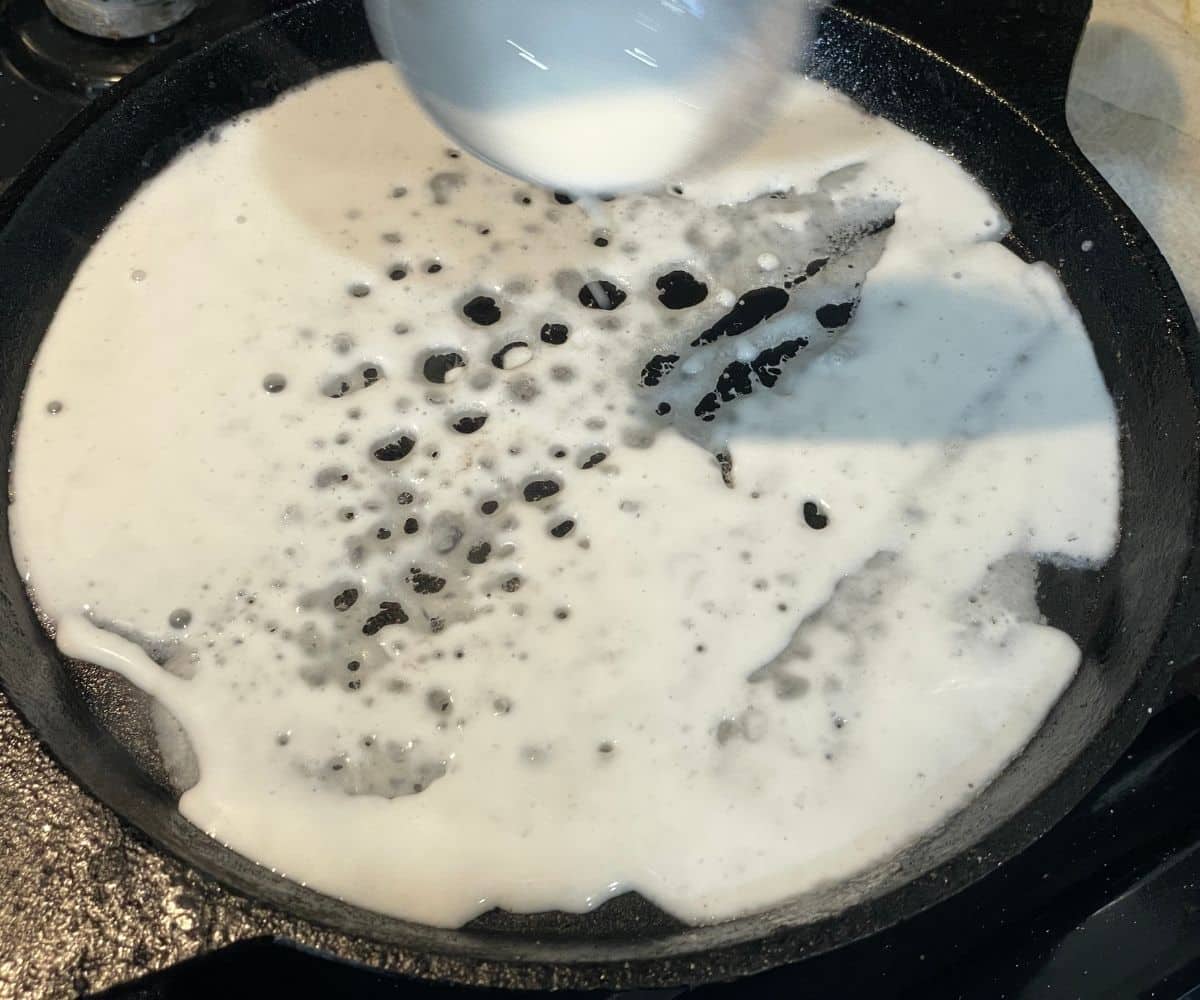
- Pour the Batter: Stir the batter each time before pouring because rice settles quickly. Hold the ladle about 1-2 inches above the pan and pour gently in a horizontal or vertical motion. Do not spread with the ladle. The batter should spread naturally and form tiny holes.
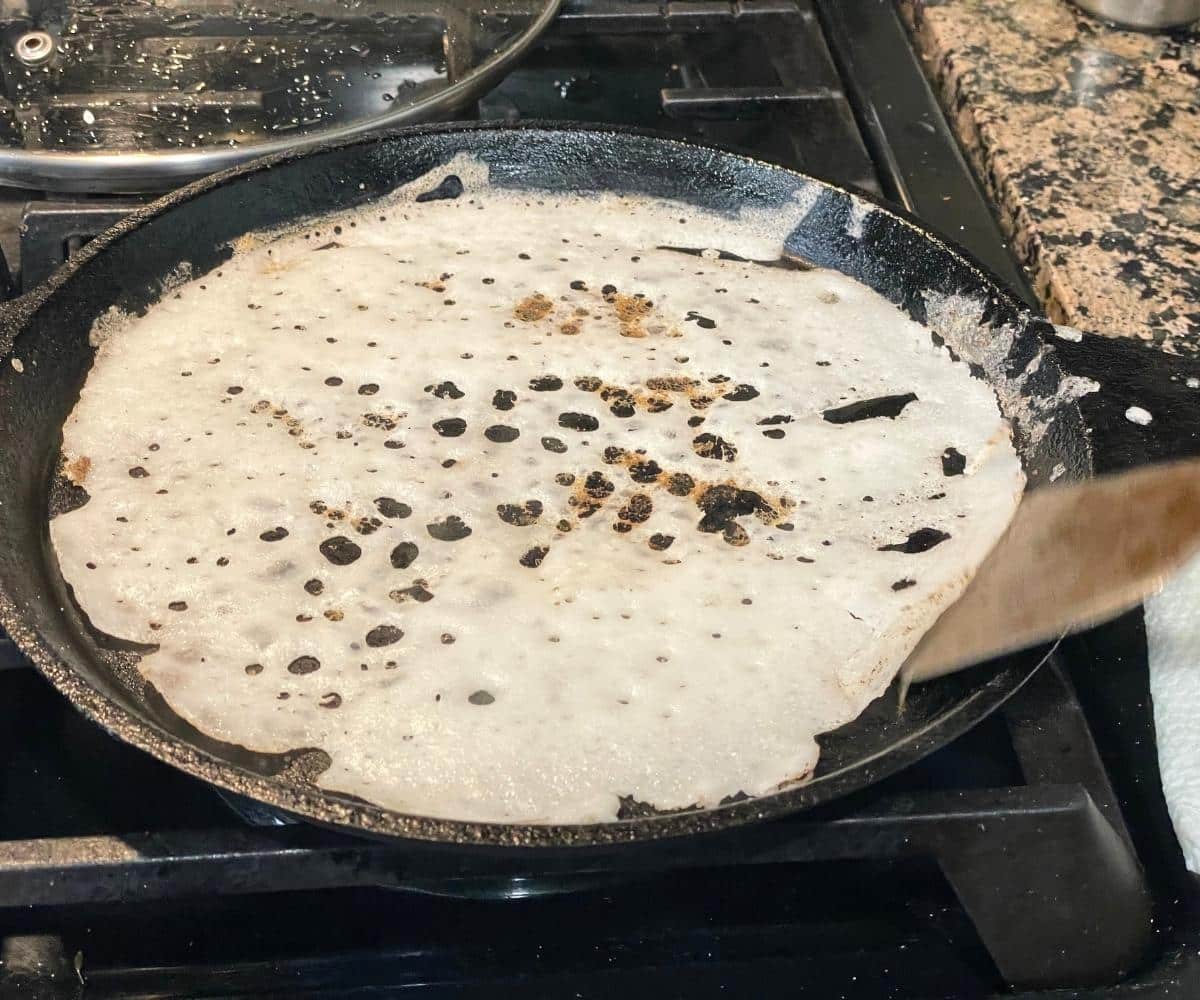
- Cook: Cover with a lid and cook for a few seconds until the neer dosa turns pale white.
- Do not flip. Neer dosa is cooked only on one side. Remove gently and serve hot. check my video recipe below in the card for more details.
Serving Suggestions
Neer dosa pairs beautifully with South Indian coconut chutney, peanut coconut chutney, tomato-onion chutney, Sambar with mullangi, and vegan curries like aloo kurma, bottle gourd kurma, and avarekalu sagu recipe.
Also pair with Mango rasayana (a traditional Udupi-Mangalore favorite combination). At home in Mangalore, we sometimes drizzle a little coconut oil over hot neer dosa for extra flavor.
Storage
- Batter stays fresh in the refrigerator for 5-7 days when stored in an airtight container.
- If the batter thickens too much in the fridge, add a little water before making dosa.
- Cooked neer dosas are best served immediately.
Uma's Tips
- The batter is the heart of neer dosa. It should be much thinner than regular dosa batter, almost like milk or thin buttermilk. If unsure, make one test dosa first and adjust by adding 1-2 tablespoons of water at a time.
- Give the batter a quick stir every single time before pouring.
- A well-seasoned cast-iron pan gives the best texture and helps the dosa release easily.
- Before pouring batter, spread a very thin layer of oil in the pan.
- Unlike regular dosa, neer dosa batter is not spread with a ladle; instead, hold the ladle slightly above the hot pan and pour gently in a horizontal or vertical motion. Let the thin batter spread naturally. The tiny holes that appear are a sign that the consistency is just right.
- No need to flip the dosa, cook only on one side.
- Do not stack while hot: Freshly cooked neer dosas are very soft and slightly moist. If you stack them immediately, they may stick together, and the neer dosa can tear while separating.
Neer Dosa Recipe FAQs
The batter may be too thin, or the pan may not be hot enough.
The batter is too thick. Add a little more water.
Yes, you can. It changes texture, color and will not give the traditional softness. Add ½ cup of grated coconut while blending the batter.
Yes, but cast iron gives the most authentic texture, taste and better release.

Indian Chutney Recipes

Did you love this recipe? Rate it ⭐⭐⭐⭐⭐!
And let me know in the comments what you loved about it.
📖 Recipe
Easy Neer Dosa Recipe
Equipment
Process Shot
Check above for step-by-step pictures (most of my recipes include pictures)
Ingredients
- 1 cup sona masoori rice - Or idli rice
- ½ teaspoon methi seeds - optional
- 2 cups water
- Salt to taste
- 1 tablespoon Sesame oil
Instructions
- Rinse rice and methi seeds thoroughly and soak for 4-6 hours or overnight.1 cup sona masoori rice, ½ teaspoon methi seeds
- Drain the soaked rice and blend with 2 cups of water until very smooth.2 cups water
- Pour the neer dose batter to the big wide bowl. Add salt, Mix well. Add more water gradually until the smooth batter becomes thin and flowing. This is the most important step the batter must not be thick.Salt to taste
- Use a well-seasoned cast iron tawa for best results. Heat on medium and lightly grease with oil (sesame oil works beautifully). The pan must be hot but not smoking.
- Stir the batter each time before pouring because rice settles quickly. Hold the ladle about 1-2 inches above the pan and pour gently in a horizontal or vertical motion. Do not spread with the ladle. The batter should spread naturally and form tiny holes.
- Cover with a lid and cook for a few seconds until the neer dosa turns pale white.
- Do not flip. Neer dosa is cooked only on one side. Remove gently and serve hot. check my video recipe below in the card for more details.
Video
Notes
- The batter is the heart of neer dosa. It should be much thinner than regular dosa batter, almost like milk or thin buttermilk. If unsure, make one test dosa first and adjust by adding 1-2 tablespoons of water at a time.
- Give the batter a quick stir every single time before pouring.
- A well-seasoned cast-iron pan gives the best texture and helps the dosa release easily.
- Before pouring batter, spread a very thin layer of oil in the pan.
- Unlike regular dosa, neer dosa batter is not spread with a ladle; instead, hold the ladle slightly above the hot pan and pour gently in a horizontal or vertical motion. Let the thin batter spread naturally. The tiny holes that appear are a sign that the consistency is just right.
- No need to flip the dosa, cook only on one side.
- Do not stack while hot: Freshly cooked neer dosas are very soft and slightly moist. If you stack them immediately, they may stick together, and the neer dosa can tear while separating.
YOUR OWN NOTES
Nutrition
Nutritional information is an estimation only.

Rashmi Metri says
How to store neer dosa? I have a big family, so need to make many! How do I make more and store?
Uma Raghupathi says
Hi Rashmi, you can place the dosa inside the hot box and store it for the whole day. Refrigerate the neer dosa batter in an airtight container for up to a week. Thank you for making this.
Hema Manjunatha says
How long we have to ferment, the batter mam, or we can use instentely after grinding the batter.
Uma Raghupathi says
Hi Hema
You can use the batter immediately after grinding it. Make sure the batter is thin.
Vijayalakshmi says
Can we use rice floor insofar making rice batter?
Uma Raghupathi says
Hi Vijayalakshmi, yes you can make neer dosa with rice flour too. But you won't get the authentic taste of dosa.
Dr Srishti Tayal says
Hi, thank you for the recipe. When I tried it, my dosas taste/smell of raw rice. Why's that?
Uma Raghupathi says
Hi Srishti,
My guess you poured the batter a little thick or it's not cooked properly! Please check the video for batter consistency! Thank you
Jay says
Hello Uma, I have Glutinous rice at home. Would it work? Thank you.
Uma Raghupathi says
Hi jay,
I never tried with glutinous rice.Perhaps you could try it and let me know. If you make this do not add methi seeds. Add grated coconut or just do it plain. Good luck!
Mangala says
Thank you for this simple dosa recipe. We tried methi seeds. So good and soft one. Love it!
Uma Raghupathi says
Thank you Mangala 🙂 yes even I like soft neer dosa.
Manjula says
Your neer dosa recipe is awesome with all the types. thank you!
Neema says
Loved your neer Dosa recipe. Thank you 😊
Uma Raghupathi says
Thank you Neema. Hope you enjoyed it with chutney.