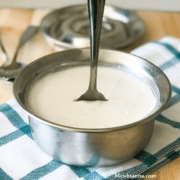
Instant Pot Coconut Milk Yogurt
Instant pot coconut milk yogurt is easy, dairy-free, and keto friendly.
Servings: 2
Calories: 262kcal
Equipment
Ingredients
- 1 can of organic coconut milk (18% fat) or coconut cream (22% fat) with no guar.
- 2 teaspoon rice flour optional
- Vegan yogurt starter probiotic
- Or use 1 tablespoon homemade coconut yogurt
Instructions
- Boil one can of coconut milk or coconut cream in a pan on a stove top. (You can also choose to do this with instant pot).
- Meanwhile, mix the rice flour with a small amount of warm coconut milk and whisk light to avoid lumps.
- Pour the rice flour mixture to the boiling pan. Stir well to avoid lumps. Switch off the heat and let it cool down to about 100-105F.
- After it cools down, take 3 tablespoon in a bowl and add the yogurt starter and, whisk until smooth. Transfer back to the pot.
- Pour the coconut milk mixture to your favorite pot or jar then place the jar inside the instant pot. Close the lid, press ‘Yogurt’ setting and set the time to 10 hours.
- Refrigerate for a few hours to cool and thicken.
Notes
- Be sure that the inner pot is clean and dry. Clean with warm water and soap.
- Be sure to buy Unsweetened, Organic, coconut milk or coconut cream with no guar.
- You don't have to buy full-fat coconut milk. I prepared this with 18% and 22% fat versions.
- If you are making this for the first time purchase a vegan starter culture. After you’ve prepared it a few times and if you are happy with it, you can start saving a tablespoon of yogurt to make new batches, but wait to do that until you’ve got the hang of making yogurt. I used my homemade coconut yogurt three times in subsequent batches.
- DO NOT add your starter yogurt until the yogurt has cooled to 100-105 F. If you add the starter sooner, it will kill off most of the live cultures.
- If you don't have a thermometer, wait until the milk reaches a light, warm temperature. (you can check with your fingertip)
- You can boil the coconut milk in an instant pot before making yogurt. I chose to boil it in a separate pan and poured the coconut milk into a steel vessel. Then I placed the container inside the instant pot for fermentation.
- The yogurt tends to thicken during the cooling process. If your yogurt is relatively thin, don't worry!! It will likely thicken some when cooled.
- Though it thickens as it cools down, I recommend adding a bit of rice flour. By adding 2 teaspoons of flour you’ll get a thicker yogurt, If you don’t mind a thinner yogurt, feel free to skip the rice flour.
- Before adding rice flour to the coconut milk, stir the flour with a small amount of warm coconut milk in a small bowl. This will help to avoid lumps or chunks in coconut yogurt.
- Go for a longer fermentation duration. Typically 10- 12 hours.
- After the yogurt is complete, place it in the refrigerator for 4- 6 hours to get a nice and thick version.
- The procedure is the same whether you choose to use coconut milk or coconut cream. I noticed a creamier and thicker yogurt from coconut cream.
Nutrition
Calories: 262kcal | Carbohydrates: 8g | Protein: 2g | Fat: 25g | Saturated Fat: 1g | Sodium: 38mg | Fiber: 5g | Sugar: 2g
